PostgreSQL vs MySQL: Which Should You Use for Your Project
Read More


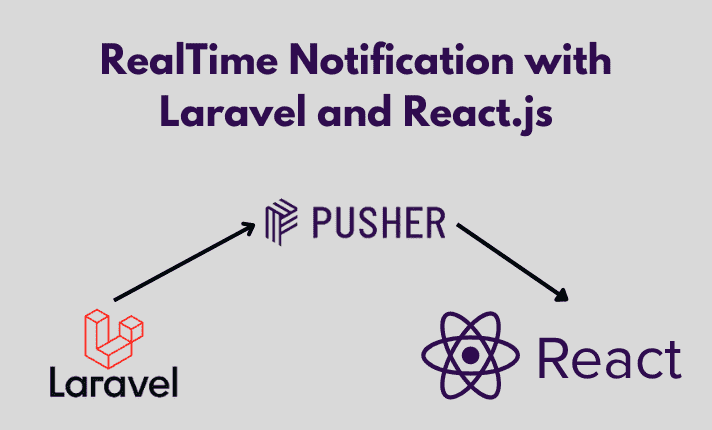
In this blog, we’re going to create a real-time notification that uses Laravel as a backend and React for the frontend. In this app, the client will get a notification as soon as a new book is stored. Let us start with the definition of real-time notifications and then dive into the code.
A real-time web application is one in which data is exchanged (virtually) instantaneously between users and the server (and, consequently, between users). This is not the case with traditional web apps, where information is requested from the server by the client.
Information must be streamed between the client and the server continuously in use cases like online multiplayer games. This is generally achieved with the help of web sockets or server-sent events. The continual streaming of information between the client and the server makes an app an real-timeapp.
Pusher sits as a real-time layer between your servers and your clients. Pusher maintains persistent connections to the clients — over WebSocket if possible and falling back to HTTP-based connectivity — so that as soon as your servers have new data that they want to push to the clients they can do, instantly via Pusher. To use Pusher you need to create a new app after signing into Pusher.com and choose React as Front end tech stack and Laravel for the Back end. Here is a picture to help you to choose the correct items.
I divided the task into a bunch of smaller tasks:
We’re gonna use pusher channels to broadcast the events so you should install the Pusher Channels PHP SDK using the Composer package manager:
composer require pusher/pusher-php-serverNow it’s time to configure the Pusher channels credential in the.envfile. After creating the app on the Pusher website you will get the PUSHER_APP_ID, PUSHER_APP_SECRET, PUSHER_APP-KEYso fill the .env file with these pieces of information. And make sure to change BROADCAST_DRIVER to pusher in your .env file.
BROADCAST_DRIVER=pusher
...
PUSHER_APP_ID=
PUSHER_APP_KEY=
PUSHER_APP_SECRET=
PUSHER_APP_CLUSTER=
Create a new event with the php artisan make:event MyEvent that will have the below structure.
php artisan make:event MyEvent
class MyEvent implements ShouldBroadcast
{
  use Dispatchable, InteractsWithSockets, SerializesModels;

  public $message;

  public function __construct($message)
  {
      $this->message = $message;
  }

  public function broadcastOn()
  {
      return ['my-channel']; // important part of realtime notification
  }
  public function broadcastAs()
  {
      return 'my-event';// important part of realtime notification
  }
}
We have an event with a MyEvent that is broadcast on the notification channel. Now we need to change Controller and the store if required (method for streaming API and alert the client that a new notification is stored in the database).
 public function store(Request $request)
    {
        $message = 'Hello, this is a real-time notification!';
        // store request into database if required

        event(new MyEvent($message));
        return response()->json('Notification sent!');
    }
Create Api route in web.php
Route::post('/post',[SendNotificationController::class,'store']);React is an ultra-popular frontend library for building user interfaces, so I choose to use React. To start a new Create React App project with TypeScript, you can run: npx create-react-app real-time --template typescript. It’s time to create simple send and get and notification-interface.
now we install depenencies of pusher such as
npm install pusher-js
I’ll present a simplified version on how to initialize the Echo instance and how to subscribe to channels.
import { useEffect } from "react";
import Pusher from "pusher-js";
export const GetNotification = () => {
  useEffect(() => {
    const pusher = new Pusher("a78b0c3f3184a051cfb6", {
      cluster: "ap1",
      encrypted: true,
    });

    const channel = pusher.subscribe("my-channel");
    channel.bind("my-event", (data) => {
      console.log("Received notification: ", data.message);
      alert(JSON.stringify(data.message));
    });

    return () => {
      pusher.unsubscribe("my-channel");
      pusher.disconnect();
    };
  }, []);
  return <div>GetNofication</div>;
};
We’ll create the simple component and define the states as follow. Send notification that we get from the server and a notification flag to check if a new notification is inserted
import  { useState } from "react";

const SendNotification = () => {
  const [firstName, setFirstName] = useState("");
  const [LastName, setLastName] = useState("");
  const [email, setEmail] = useState("");
  const [password, setPassword] = useState("");

  const Login = async (e) => {
    e.preventDefault();
    console.log(firstName);
    const { data } = { firstName, LastName, email, password };
    const res = await fetch("http://127.0.0.1:8000/api/post", {
      method: "POST",
      body: JSON.stringify(data),
      headers: { "Content-Type": "application/json" },
    });
    console.log(res);
  };
//  its just a form
  return (
    <>
      <div className="relative flex flex-col justify-center min-h-screen overflow-hidden">
        <div className="w-full p-6 m-auto bg-white rounded-md shadow-xl shadow-rose-600/40 ring-2 ring-indigo-600 lg:max-w-xl">
          <h1 className="text-3xl font-semibold text-center text-indigo-700 underline uppercase decoration-wavy">
            Sign UP
          </h1>
          <form className="mt-6" onSubmit={Login}>
            <div className="mb-2">
              <label
                htmlFor="first_name"
                className="block text-sm font-semibold text-gray-800"
              >
                Firstname
              </label>
              <input
                type="text"
                className="block w-full px-4 py-2 mt-2 text-indigo-700 bg-white border rounded-md focus:border-indigo-400 focus:ring-indigo-300 focus:outline-none focus:ring focus:ring-opacity-40"
                value={firstName}
                onChange={(e) => setFirstName(e.target.value)}
              />
            </div>
            <div className="mb-2">
              <label
                htmlFor="last_name"
                className="block text-sm font-semibold text-gray-800"
              >
                Lastname
              </label>
              <input
                type="text"
                className="block w-full px-4 py-2 mt-2 text-indigo-700 bg-white border rounded-md focus:border-indigo-400 focus:ring-indigo-300 focus:outline-none focus:ring focus:ring-opacity-40"
                value={LastName}
                onChange={(e) => setLastName(e.target.value)}
              />
            </div>
            <div className="mb-2">
              <label
                htmlFor="email"
                className="block text-sm font-semibold text-gray-800"
              >
                Email
              </label>
              <input
                type="email"
                className="block w-full px-4 py-2 mt-2 text-indigo-700 bg-white border rounded-md focus:border-indigo-400 focus:ring-indigo-300 focus:outline-none focus:ring focus:ring-opacity-40"
                value={email}
                onChange={(e) => setEmail(e.target.value)}
              />
            </div>
            <div className="mb-2">
              <label
                htmlFor="password"
                className="block text-sm font-semibold text-gray-800"
              >
                Password
              </label>
              <input
                type="password"
                className="block w-full px-4 py-2 mt-2 text-indigo-700 bg-white border rounded-md focus:border-indigo-400 focus:ring-indigo-300 focus:outline-none focus:ring focus:ring-opacity-40"
                value={password}
                onChange={(e) => setPassword(e.target.value)}
              />
            </div>
            <div className="mt-6">
              <button className="w-full px-4 py-2 tracking-wide text-white transition-colors duration-200 transform bg-indigo-700 rounded-md hover:bg-indigo-600 focus:outline-none focus:bg-indigo-600">
                Login
              </button>
            </div>
          </form>

          <p className="mt-8 text-xs font-light text-center text-gray-700">
            {" "}
            Already have an account?{" "}
            <a href="#" className="font-medium text-indigo-600 hover:underline">
              Sign in
            </a>
          </p>
        </div>
      </div>
    </>
  );
};

export default SendNotification;
After defining the required state of the app, you can start subscribing to the Pusher channel and binding to the events emitted by your server. We defined a function with a pusher Event name that is responsible for getting new notifications-events from store channel and then enable notification flag and add the newly inserted book to the state.
You can find whole the code from the below repository: https://github.com/Showkiip/laravel-react-notification.git
youtube : https://www.youtube.com/watch?v=-ZjmoW9Syt0
Recent posts form our Blog
.png)
.png)
.png)
.png)
.png)

0 Comments
Like 1