


.png)


.png)

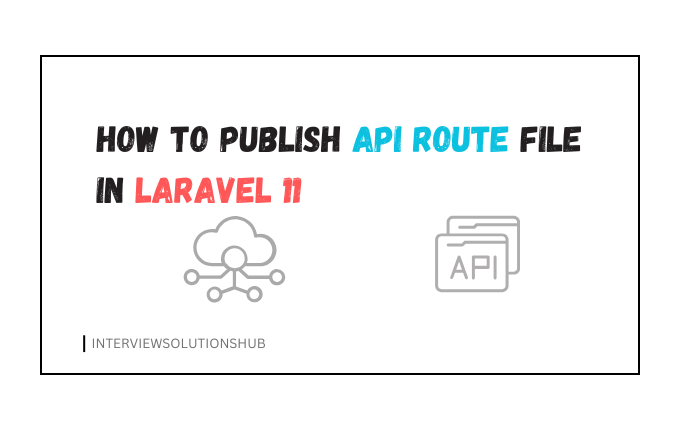
How to Publish API Route File in Laravel 11
Read More

.png)
In this tutorial, we will explore how to install and use CKEditor in a Laravel 10 project. CKEditor is a popular open-source WYSIWYG (What You See Is What You Get) text editor that allows users to create and edit content with rich formatting options. It is widely used in web development projects, including Laravel applications.
There are two ways to install and utilise CKEditor in a Laravel 10 project. However, this guide will teach you how to install CKEditor in a Laravel 10 project in a straightforward manner.
This is optional; however, if you have not yet built the Laravel app, you may proceed with the command below.
DB_CONNECTION=mysql
DB_HOST=127.0.0.1
DB_PORT=3306
DB_DATABASE=post
DB_USERNAME=root
DB_PASSWORD=rootOpen the command prompt. then run the following command on it. To create the form's model and migration file, follow these steps:
php artisan make:model Post -m
database/migrations/create_posts_table.php
use Illuminate\Support\Facades\Schema;
use Illuminate\Database\Schema\Blueprint;
use Illuminate\Database\Migrations\Migration;

class PostsTable extends Migration
{
    /**
     * Run the migrations.
     *
     * @return void
     */
    public function up()
    {
        Schema::create('posts', function (Blueprint $table) {
            $table->id();
            $table->string('title');
            $table->text('body');
            $table->timestamps();
        });
    }

    /**
     * Reverse the migrations.
     *
     * @return void
     */
    public function down()
    {
        Schema::dropIfExists('posts');
    }
}
Then, reopen the command prompt and enter the following command to add tables to the database:
php artisan migrateAdd the fillable attribute to the Post model, which is located in the app/models directory, in this step:
App/Models/Post.php
<?php

namespace App\Models;

use Illuminate\Database\Eloquent\Factories\HasFactory;
use Illuminate\Database\Eloquent\Model;

class Post extends Model
{
    use HasFactory;

    protected $fillable = [
        "title",
        "body"
    ];
} <?php
use App\Http\Controllers\PostController;
use Illuminate\Support\Facades\Route;
/*
|--------------------------------------------------------------------------
| Web Routes
|--------------------------------------------------------------------------
|
| Here is where you can register web routes for your application. These
| routes are loaded by the RouteServiceProvider within a group which
| contains the "web" middleware group. Now create something great!
|
*/
Route::get('posts', [PostController::class, "index"]);
Route::get("create", [PostController::class, "create"]);
Route::post('store', [PostController::class, "store"]);
php artisan make:controller PostController
App/Http/Controllers/PostController
<?php

namespace App\Http\Controllers;

use Illuminate\Http\Request;
use App\Models\Post;

class PostController extends Controller
{
    /**
      * Write code on Method
      *
      * @return response()
      */
    public function index() {

        $posts =  Post::orderBy("id", "desc")->paginate(5);

        return view("posts", compact("posts"));
    }

    /**
     * Write code on Method
     *
     * @return response()
     */
    public function create() {

        return view("create");
    }

    /**
     * Write code on Method
     *
     * @return response()
     */
    public function store(Request $request) {

        $post = [  "title"  =>  $request->title,
                    "body" => $request->body
                ];

        $post  =  Post::create($post);

        return back()->with("success", "Post has been created");

    }
}
resources/views/posts.blade.php
<html lang="en">
<head>
    <meta charset="utf-8">
    <meta name="viewport" content="width=device-width, initial-scale=1, shrink-to-fit=no">
    <!-- Bootstrap CSS -->
 <link rel="stylesheet" href="https://cdn.jsdelivr.net/npm/bootstrap@5.2.3/dist/css/bootstrap.min.css" integrity="sha384-rbsA2VBKQhggwzxH7pPCaAqO46MgnOM80zW1RWuH61DGLwZJEdK2Kadq2F9CUG65" crossorigin="anonymous">
    <style>
        table td p {
        word-break: break-all;
        }
    </style>
</head>
<body>
<div class="container mt-4">
    <div class="row">
        <div class="col-xl-8">
            <h3 class="text-right"> Laravel 8 CKEditor Integration Example</h3>
        </div>
        <div class="col-xl-4 text-right">
            <a href="{{url('create')}}" class="btn btn-primary"> Add Post </a>
        </div>
    </div>
    @if(count($posts) > 0)
        <div class="table-responsive mt-4">
            <table class="table table-striped">
                <thead>
                    <tr>
                        <th>Id</th>
                        <th style="width:30%;"> Title </th>
                        <th>Decription</th>
                    </tr>
                </thead>
                <tbody>
                    @foreach($posts as $post)
                        <tr>
                            <td>{{ $post->id }}</td>
                            <td>{{ $post->title }}</td>
                            <td>{!! html_entity_decode($post->body) !!}</td>
                        </tr>
                    @endforeach
                </tbody>
            </table>
        </div>
        {{ $posts->links() }}
    @endif
</div>

</body>
</html>
Then create the create.blade.php file and update the following code into it:
resources/views/create.blade.php
<html lang="en">
<head>
    <meta charset="utf-8">
    <meta name="viewport" content="width=device-width, initial-scale=1, shrink-to-fit=no">
 <link rel="stylesheet" href="https://cdn.jsdelivr.net/npm/bootstrap@5.2.3/dist/css/bootstrap.min.css">

    {{-- CKEditor CDN --}}
<script src="https://cdn.ckeditor.com/ckeditor5/39.0.1/classic/ckeditor.js"></script>

</head>
<body>
<div class="container mt-5">
    <div class="row">
        <div class="col-xl-12 text-right">
            <a href="{{ url('posts') }}" class="btn btn-danger"> Back </a>
        </div>
    </div>
    <form action="{{url('store')}}" method="POST">
    @csrf
        <div class="row">
            <div class="col-xl-8 col-lg-8 col-sm-12 col-12 m-auto">
                @if(Session::has('success'))
                    <div class="alert alert-success alert-dismissible">
                        <button type="button" class="close" data-dismiss="alert">×</button>
                        {{ Session::get('success') }}
                    </div>
                @elseif(Session::has('failed'))
                    <div class="alert alert-danger alert-dismissible">
                        <button type="button" class="close" data-dismiss="alert">×</button>
                        {{ Session::get('failed') }}
                    </div>
                @endif
                <div class="card shadow">
                    <div class="card-header">
                        <h4 class="card-title"> Laravel 10 Install CKEditor Example Tutorial </h4>
                    </div>
                    <div class="card-body">
                        <div class="form-group">
                            <label> Title </label>
                            <input type="text" class="form-control" name="title" placeholder="Enter the Title">
                        </div>
                        <div class="form-group">
                            <label> Body </label>
                            <textarea class="form-control" id="body" placeholder="Enter the Description" name="body"></textarea>
                        </div>
                    </div>
                    <div class="card-footer">
                        <button type="submit" class="btn btn-success"> Save </button>
                    </div>
                </div>
            </div>
        </div>
    </form>
</div>

<script>
    ClassicEditor
    .create( document.querySelector( '#body' ) )
    .catch( error => {
    console.error( error );
    });
</script>

<script src="https://ajax.googleapis.com/ajax/libs/jquery/3.6.4/jquery.min.js"></script>
<script src="https://cdn.jsdelivr.net/npm/bootstrap@5.2.3/dist/js/bootstrap.bundle.min.js" ></script>
<script src="https://cdn.jsdelivr.net/npm/bootstrap@5.2.3/dist/js/bootstrap.min.js" ></script>
</body>
</html> Now, open a terminal and run the following command to start the development server:
php artisan serve

Youtube : https://www.youtube.com/watch?v=IQfnxF1P_sQ

Greetings, I'm a passionate full-stack developer and entrepreneur. I specialize in PHP, Laravel, React.js, Node.js, JavaScript, and Python. I own interviewsolutionshub.com, where I share tech tutorials, tips, and interview questions. I'm a firm believer in hard work and consistency. Welcome to interviewsolutionshub.com, your source for tech insights and career guidance.
Recent posts form our Blog
.png)
.png)
.png)

showkat ali
Great